Tofu 101

I’ve shifted most of my food postings to my Instagram account but like the old soul that I am, every once in a while inspiration strikes to just write. Recently, the topic of tofu and vegetarianism came up on a social media group that I’m a part of and I realized that in the  14 months since my last posting, we discovered a new tofu preparation and failed to share it!

12555962_214175275592823_390561898_n

There is really only 1 rule with tofu and that is that you have GOT to press out the water that it comes packed in! If you’re buying a pre-pressed, pre-marinated shrink wrapped package (like the TofuBaked brand) this doesn’t apply – they pressed it in the factory before they added the flavoring. If you’re doing that anyway you don’t need to know the rest of these tofu-pearls-of-wisdom (but I invite you to keep reading and see if I can convince you to DIY next time!) But any tofu purchased in a plastic cube that comes in liquid, you’ve GOT to get rid of that water. Why? Because in the months since it was packaged, your little tofu cube has been absorbing the water it’s packed in and that means there’s no room (literally) for it to absorb FLAVOR!

Even if you’re only going to eat tofu a few times a month, I strongly suggest that  you invest in a press — I like this one. It’s much cleaner and easier than the suggestions online for pressing without. If you don’t want to invest just yet, here’s how to start:

  1. Open your tofu package and drain the water.
  2. Wrap the block in paper towels or a clean tea towel, then sandwich it between 2 cutting boards.
  3. Load a few cans of beans/veggies/anything heavy on top of the upper cutting board and let sit for a few hours.
  4. The tofu will leech out all the water it was packed in – the block will shrink a bit but that’s ok because it was just filled with tasteless water!
  5. Undo your pressing station setup, cube or slice the tofu and use in a recipe.

Once you’ve got your pressed tofu, it’s quite literally a blank canvas. Tofu absorbs any flavor you add to it VERY well. We use it mostly like chicken/pork — it works in pretty much any cultural preparation (Asian, Mexican, or Indian!) I tend to press tofu overnight and then in the morning, drop into a plastic bag full of marinade to let it sit while I’m working, then take out before dinner to cook….just like you would with any meat!

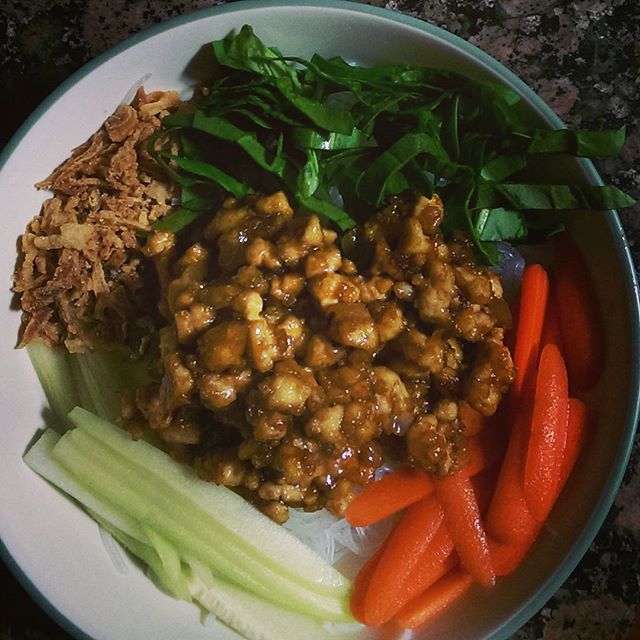
For this particular preparation style, you DON’T want to marinate the tofu. Just use your hands to crumble pressed tofu into a medium bowl (will kinda look like scrambled eggs) and toss with a spoonful of cornstarch to coat. Heat oil in a large skillet on high heat, then add the tofu and cook until it’s browned and crispy, breaking up with a wooden spoon as you cook to keep pieces evenly sized. It should resemble cooked ground meat by the time it’s done. Transfer tofu to a plate. If desired, saute veggies/garlic/onions based on your dish until soft, then add tofu back in. Pour in liquid (anything works here, start with vegetable broth or soy sauce for the most part) — about a cup of liquid per block of tofu. Cook about 5-8 minutes until most of liquid is gone and tofu is ‘glazed’.

Some applications for this are:

  • Asian stirfries. Saute onions/garlic with bell pepper, edamame, broccoli, carrots, peas, or bok choy. Use soy sauce, rice wine vinegar, sesame oil, grated ginger, and fish sauce (if using) to make your liquid
  • Mexican filling (tacos, quesadillas, nachos, etc). Saute onions/garlic with bell peppers, black beans, spicy peppers, or corn. Sauce would be mostly vegetable broth with some cumin, chili powder, garlic powder, and onion powder.
  • Sloppy Joes. Onions and bell pepper are all you need – use vegetable broth, ketchup, BBQ sauce of choice, liquid smoke, and paprika/cayenne/chili powder to taste.


Of course, you can always follow a recipe for baking, frying, steaming, grilling, or searing tofu….but this is so much fun to adapt as desired!

Pregnancy Cravings 101

Vegetarian for Two is soon to be Vegetarian for Three! D and I are expecting a baby boy this fall (October) and couldn’t be more ecstatic. Pregnancy has been humbling in regards to my diet, and I find myself cramming in protein wherever I can get it!

While I’ve had an otherwise easy and fairly uneventful first 18 weeks, I’ve noticed my biggest weakness is the inability to get a craving out of my head. For weeks after watching Food Network I just wanted veggie burgers, and recently my food tastes have turned towards Indian and Thai. Baby loves the protein, I love the sauces and spices, and D loves getting to be needed in the kitchen!

This week we grabbed a ton of fresh veggies from the store (our re-wrap section is phenomenal and a great place to find produce at its peak for 1/4-1/2 price) and wanted to use them cohesively. This curry was the perfect combination of everything we’d stocked up on and is so easy to make you’ll question ever ordering takeout again!

Red Curry 

  • 2 TBSP coconut oil
  • 2 TBSP red curry paste (I like Thai Kitchen)
  • 1-2 TBSP natural peanut butter
  • Few shakes of soy sauce
  • Squeeze of lime juice or dash of any vinegar- rice wine works well
  • 1 can coconut milk, doesn’t matter if it’s low fat or full fat
  • Veggies of choice – we used sweet potato, red bell pepper, and green beans (cauliflower would also be amazing). You want about 2 cups of prepared veggies total
  • Protein of choice – we used cubed tempeh but could use tofu, chicken, pork, shrimp. If using raw meat, be sure to pre-cook beforehand as the curry won’t get hot enough to cook raw meat to the correct temperature
  • fresh cilantro

Heat the coconut oil in a Dutch oven (I love my Le Creuset for this) or large pot until warm – add curry paste and fry until well toasted. It WILL smell amazing! Add in peanut butter until melted, then soy sauce and vinegar/lime – combine all flavors. Add in coconut milk and cook together at a simmer for 2-3 minutes.

Add in washed and prepared veggies of choice and protein, then let everything cook together 20-30 minutes until vegetables are cooked. Stir in some fresh, chopped cilantro about 5 minutes before the end of your cooking time, then serve with rice or quinoa and additional cilantro.

*if using potatoes, I recommend washing and peeling them, then dicing into ½ inch cubes. Steam the cubes in a vegetable steamer or pre-cook in the microwave  before adding to the curry – you don’t want them to break down completely and be mushy, or be raw since they won’t cook enough in 20 minutes.

IMG_0377

‘Scary’ Seitan

Seitan not only is spelled funny, but when spoke aloud, evokes thoughts of a fiery devil- just waiting to strike anyone who dares to mess with it. That pretty much sums up how I felt about seitan (say-tan) until I read Vegetarian Times’ recipe over winter break and realized that despite its intense versatility and presence on many experienced vegetarian/vegan menus, doesn’t necessarily mean it’s inaccessible for the home chef. I figured with a small enough ingredient list and amble time on my hands, all I had to lose was a few dollars worth of food and potentially my bragging rights about being able to tackle pretty much any recipe…I used Vegetarian Times’ instructional video to get my bearings before starting off and I highly recommend it for anyone who’s wary of making their own seitan at first.

We made the seitan loaves exactly as called for, just adding a dash of sage into the dough for some additional flavor. We boiled them in the seasoned broth, and realized they have the appearance of a meatloaf with a similar external texture to a matzo ball – that dimpled, cloud-looking, puffy look. If we had packed our loaves a bit more tightly before boiling, I imagine we would have gotten a smoother external surface.

Asian marinated seitan loaf with ginger glazed carrots

Asian marinated seitan loaf with ginger glazed carrots

Our first seitan entree game-plan was to treat the seitan almost like meatloaf – we made a glaze of soy sauce, hoisin, and some sesame oil (in addition to about 2 tablespoons of the cooked, diced onion from the cooking broth) and drizzled this over 1 of the seitan loaves. Just as we did this, our power went out! We wrapped the baking dish in foil, quickly stuck it in the fridge, and went out to dinner. As a result, we unintentionally marinated our seitan loaf for 24 hours before cooking it the next day, which I recommend- the flavors penetrated the ‘meat’ and were delicious! To serve, we baked the seitan uncovered for about 20-25 minutes to warm it and allow the sauce to thicken – we basted it about 3 times throughout the cooking process. We then steamed some carrots and tossed them with just a bit of butter, brown sugar, and grated ginger. Together it was a really hearty but not overly dense meal – and we still had 1 loaf of seitan left over for another night! While it may be a 2-day process (1 to make the seitan and another to make the entree) it was well worthwhile to have a new source of protein that is so easily adaptable to any flavors.

A depiction of our night in photos...

From good, to better, to best…the dogs thought so too!

With our extra loaf of seitan, we opted for a more casual meal and made a faux BBQ brisket sandwich. We marinated our leftover loaf in the cooking liquid doctored up with some additional Worchestershire sauce and Liquid Smoke, and sliced the seitan loaf paper-thin, then seared the pieces in a large skillet. As they cooked, they started to shrink up a bit and crisp around the edges, reminding us of cooking bacon or slabs of ham on a flattop (we may not eat it anymore, but we still watch Food Network!) We toasted some of our homemade dutch oven loaf of bread and spread our favorite BBQ sauce on each side, then topped the bread with thinly sliced pickles. Once the seitan was well seared and developed a bit of a crust, we made 2 piles of seitan in the skillet and topped each with some cheddar cheese. We added about 1/4 cup of the marinading liquid to the pan and covered it, allowing the cheese to melt and the seitan to aborb back some of the flavors from the marinade. Once the cheese had melted, we added the seitan ‘pile’ onto the bread. If the dogs’ faces (above…both chins resting on my knee!) are any indication, this smelled phenomenal and tasted exactly like the BBQ we’ve grown to miss just a bit (a natural result of living in the South). With this recipe, however, I know we’ll be satiated when the craving strikes. It has the smoke from the marinade, the sweetness of the sauce, and the exact texture of soft, crunchy, and chewy meat. The cheese is evocative of the mac n’ cheese served alongside BBQ here in South Carolina, and the sour pickles broke up the richness of everything with a little punch. We wolfed down these sandwiches and were amazed by just how believable the seitan was in this preparation.

Overall, our seitan experience was nothing less than eye-opening, and far from the mess and stress I had built it up to be in my mind. The preparation of the dough is incredibly simple and leaves amble room for experimentation and personalization of the recipe, and the cooking technique is very hands-off and simple. Once cooked, you have a myriad of ways to prepare your seitan and all are relatively quick, as the ‘hard’ part is done upfront. For our next seitan adventure, we’ll shape our dough into nuggets before cooking and see if we can imitate a dippable, bite-sized meat substitute. We also plan to customize the dough more by planning in advance what the final preparation will be; perhaps paprika and garlic powder for ‘chicken’ dishes, sage and tarragon for ‘turkey’, and some liquid smoke and Worchestershire for ‘beef’.

While seitan is available pre-prepared in stores, I had never tried to cook with it, instead leaving it to the experts at vegan restaurants nearby. I can now safely say that it will be a staple in our meal preparations, since it’s so easy to make, fun to come up with new combinations, and relatively cheap…especially compared to other meat substitutes that come frozen. Locally we can buy vital wheat gluten (the key ingredient for seitan) for about $3 per 6 oz box, and it takes 2 boxes to make a batch of seitan (each batch makes about 8 servings). Now that I’ve gotten over my fear of seitan, I’ve started ordering it in bulk from Amazon for much cheaper, knowing I’ll go through the volume associated with a full case (they don’t sell the Bob’s Red Mill vital wheat gluten at my local store). With this new source of protein, I don’t think we’ll ever scour the sales for pre-packaged meat substitutes again!

What kinds of recipes do you want to see us tackle using seitan? What are your suggestions for incorporation seitan into our weekly meals?

Note: We stored our leftover seitan loaf in the broth it was cooked in to keep it moist in between meals. You could easily use this time to marinate remaining seitan for another entree, but if you don’t have another meal in mind it’s best when stored in liquid. The liquid is a flavorful base for  many other sauces, so don’t throw it away once the seitan has finished boiling!

Better late than never

About this time last year, I mentioned some recipes that we had in the hopper to try out in the cooler winter months. For our RSVP cards for the wedding, we had asked our family and friends to return a postcard with a vegetarian recipe on it that we could add to our repertoire. Two recipes caught our eye as we flipped through the cards over the weeks leading up to the wedding, and we have been anxious to make them ever since. Admittedly it’s now been 14 months…but better late than never!

front of the postcard

front of the postcard

Shakshuka (suggested by our friend Harry)

  • 2-3 cloves garlic
  • 1 white or yellow onion, diced
  • 2 peppers, diced (Harry likes red/yellow bell peppers, we like a combination of bell pepper with Cubanelle and Poblano)
  • 2 14oz cans of fire roasted tomatoes
  • 2 teaspoons tahini
  • 6 eggs
  • 1 loaf of reallllllly good crusty bread (we particularly love this Dutch Oven Crusty Bread recipe…easy, low maintenance, and incredible texture!)
  • Spices to taste: paprika, za’atar, cumin, chili powder, salt, pepper, and basil

Saute garlic and onions in olive oil in a large saute pan until softened, then add in peppers. Once soft, stir in tomatoes and season to taste – you want a warm, slightly spicy combination of flavors from the spices. Drop in the tahini and stir, it will melt into the onion/pepper/tomato mixture. Bring to a boil  and then simmer for 15 minutes. Taste the tomato base and adjust seasonings as desired- when you’re ready crack eggs one at a time into a small bowl and then gently nestle into the tomato base. Cover the skillet until the eggs are opaque and soft boiled- about 4 minutes. Serve with slices of crusty bread and try to avoid eating the whole pan – but good luck! The tomato sauce is a combination of marinara sauce and a minestrone soup, with a creaminess from the tahini. The eggs are perfectly tender and if allowed to remain just a bit raw, the rich yolk mixes with the acidic tomatoes for a winning combination.

IMG_20150104_094825

Look at those eggs, nestled perfectly among a simmering tomato base!

IMAG1066

The sign of perfect homemade bread- air bubbles throughout and a crusty exterior!

Mujadara (courtesy of Aunt Jane, culinary mastermind behind the blueberry chutney!)

  • 3/4 cup lentils
  • 1/2 tsp salt
  • 4 cups water
  • 1 cup brown rice (see directions below – you could also use cooked white rice)
  • large pot of water
  • 1/2 tsp salt
  • 6 cups onions (about 3 large onions) – halved and sliced thinly
  • 2 TBSP olive oil
  • 2 TBSP butter
  • Spices: cinnamon, cumin, coriander, paprika, chili powder

Cook lentils in 4 cups of simmering water (with 3 cloves of garlic and 2 bay leaves) until soft, but not mushy (approx 15-20 minutes). Set aside.  In a separate large stock pot, bring a full pot of salted water to a boil. Add 1 cup of brown rice and boil uncovered for 30 minutes (think of it like pasta). Drain, turn off heat, and return rice to the pot – cover and let steam for an additional 10 minutes. Set aside. In a deep, wide saute pan, cook onions, butter, and olive oil for 5 minutes on low, seasoning with salt and above spices – a sprinkling of each. Raise heat to medium and cook 10 more minutes. Cook another 3-4 minutes at high heat until caramelized. Combine rice, lentils, and onions in a large bowl.

In a small bowl, mix together 1/2 cup Greek yogurt with 1/2 tsp each of cinnamon, cumin, coriander, and paprika. Add a dash of chili powder and 3 TBSP chopped mint, the juice and zest of 1 lemon, and salt. Serve lentils with a dollop of yogurt.

The texture of the rice and lentils together, plus the sweet, crunchy onions and the tang of the yogurt was a winning combination. This is such a hearty meal due to the lentils (protein) and the rice (starch), and yet isn’t overly heavy – it still feels fresh and light because of the brightness of the yogurt on top. The leftovers are even better than the first time around, so if you have the time plan to make this the day before you plan to serve it. This may be our new go-to potluck dish, as it’s incredibly simple to assemble (basically 3 components all combined together at the end) and is well spiced without being overly aggressive. It also travels incredibly well- just 1 container for the mujadara itself and another for the yogurt! Try this for your next weeknight dinner or group get-together and thank us (and Aunt Jane!) later!

The best things are worth waiting for…

With winter break just barely over, I already find myself missing the abundance of free time that is a little-considered benefit of working in education. Each year, I start a list right around Thanksgiving of things I want to do, make, or take care over the long break and this year the list became a collection of recipes I’ve been intending to try, but haven’t because I didn’t think that they were accessible enough for a weeknight meal after a long day of work. Boy was I wrong…

Tempeh Piccata 

Ever since a recent (disappointing) trip to a local Italian joint, I have been craving piccata. I didn’t think tofu would be an appropriate canvas for such a fantastically textured sauce, so some exploring on the magic internet brought me to Vegetarian Times’ recipe for Tempeh Piccata. Admittedly I was hesitant of how much you can actually tranform tempeh, but figured I had the time, the ingredients, and the curiosity to see this through, and Vegetarian Times has rarely steered me wrong!

IMAG1041 (1)For the tempeh triangles, we cut each ‘bar’ of tempeh into 3 squares like the recipe calls for, then cut each square into 2 triangles. We then split each triangle lengthwise, creating a thinner ‘steak’ of tempeh. We altered the timeline for the recipe a bit, starting by soaking the tempeh in milk and dredging it, then frying them in two batches. After the first batch, we dropped some orecchiette in water (the shape was perfect to nestle and catch the sauce!) and while the second batch was cooking, we made the sauce in a separate saucepan so that everything would be hot at the same time. Drop a tablespoon of butter into the sauce right at the end for added smoothness and to round out the flavors.

We really liked how tender the tempeh got because of how thin it was, in addition to the ratio of breading to tempeh…I think the normal thickness of a tempeh bar would be too dense in relation to the crust. The crunch on the breading was fantastic and offset the richness and tartness of the piccata sauce. From start to finish, dinner was less than 30 minutes to prep and cook, and I don’t think it was just anticipation that made us savor every last bite! Sometimes putting aside a project for a while lets you truly appreciate the fruits of your labor upon eventual success. Happy New Year from our family to yours!

Soul Searching and Soul Food

Yes, it’s been 5 months… between the chaos of the move and this time of year for work, every time I go to write an inspired and lip-smacking post something else comes up. And then when I find the time to write, I find myself searching for the right words to describe a meal that I thoroughly enjoyed at the time, but barely remember as a result of how many other things have happened since I last ate it! And then the ultimate question comes up – does the world really need another blog? Another semi-proclaimed cook documenting the ins and outs of their kitchen? My inclination is no – I’m not making culinary revelations here, just sharing the real life vegetarian meals of a working couple. But then I find myself giving food advice just about everywhere – in the office with a coworker who considers a slow-cooker intimidating, on Facebook with a young professional who is trying to wean herself off fast food after long days at work, and in the grocery store when someone looks perplexed by how to cook brussels sprouts on the stalk! I may not be an expert or the next Food Network Star, but I do love food and making fulfilling and memorable meals that are meat-free.

Messy Mac-- ooey gooey goodness!

Messy Mac– ooey gooey goodness!

This week a close friend gave birth to her 3rd child, and D and I went over to watch her older two munchkins to give her and her husband some time at the hospital alone with the baby. I read Chloe’s Vegan Italian Kitchen cover to cover on the couch (after the kids were in bed!) and found myself in quite the mac and cheese mood. Maybe it was being surrounded by kids toys, or the plethora of pasta recipes, or the warm and fuzzy feelings of a brand new baby. But mac and cheese has been on my mind ever since, particularly how to make it healthier and more interesting than just noodles and cheese – while still retaining the soul food feeling that a big bowl of mac and cheese can evoke.

Messy Mac ‘N Yease 

  • 1 box of the pasta of your choice- we like quinoa pasta in shells
  • 1 head broccoli, cut into small florets
  • handful of frozen peas
  • few ounces of mushrooms, any variety (we used shitake since they were in the house)
  • 2 inches of Soyrizo (found at Trader Joes or Whole Foods)
  • 4 tablespoons butter or vegan option
  • 3-4 tablespoons flour
  • 1 cup milk (we used original, unsweeted Almond Breeze)
  • heaping teaspoon dijon mustard (could substitute dried mustard)
  • 5 dashes Worcestershire sauce (or vegan Worcestershire)
  • 1/2 cup nutritional yeast

In a small saute pan, cook the mushrooms and Soyrizo together until the mushrooms cook down and the Soyrizo starts to crisp up. Set aside and let the flavors meld together. Cook the pasta according to the package directions, salting the water liberally, and adding the broccoli and peas in the last 3-4 minutes. While the pasta is cooking, melt the butter on medium heat in a large saute pan and once completely melted, add the flour. Reduce heat to low, stir to combine and cook about 2 minutes, until the roux turns slightly caramel in color. Add in the milk and stir periodically until the mixture starts to thicken. When you can drag a spoon through the pan and see the bottom of the pan for just a second (before the roux fills the space back in) add in the mustard and Worcestershire. Stir to combine and then add in nutritional yeast. Once fully combined, season with salt and pepper to taste. Once the pasta is cooked, drain and add into the ‘cheese’ sauce, adding some pasta water if needed to thin out the sauce. Toss pasta in sauce to fully coat, then mix in mushroom/Soyrizo mixture. Serve warm and prepare to go back for seconds!

This isn’t your traditional mac and cheese by any means- the veggie ratio is about 1:1 compared to the pasta. There’s a kick to the sauce from the Soyrizo, but the creamy texture of the ‘cheese’ sauce masks the heat from being overwhelming. The accompanying crunch from the crispy Soyrizo is bacon-esque, and the mushrooms add a little earthy flavor and heartiness.The juiciness of the broccoli (yes, that’s a thing…if cooked right!) gives a little relief from the decadence of the dish, and the peas add a subtle and interesting sweetness when you least expect it. This comes pretty close to making mac and cheese healthy, if such a thing is possible. And all in all, this scratch-made, vegan, veggie-laden ‘messy mac’ took just about as long as the stuff from the box.

Tonight, my heart is happy and my stomach is full. And you can’t ask for more in life than that.

Vegciting News!

The backyard garden is brimming with peppers, tomatoes, and herbs and summer produce is a staple of our diet– fresh corn, peaches, and blueberries seem to appear on our plates in some form daily. Despite this veritable bounty of fresh goodness, we’ve been eating out a little more than usual. Why, you may ask?

VegetarianForTwo is moving! Just down the street a few miles, but moving nonetheless. What began on a whim as a search for a new ‘dream home’ resulted in a house we couldn’t let slip away. Realizing we can’t live in 2 places at once, we quickly put our starter house on the market and within a few days had an offer from a newlywed couple who loves to garden too– perhaps a new couple friend for us!? This excitement and stress of having our house showing-ready at all times means that our ability to cook at our usual level has been stunted, since we never know how much time we’ll have to clean up and get the house ready to show. However, now that we’ve got a contract signed, life will return to semi-normal! You’ll see a few different kitchen counters in the coming months as we transition (temporarily) to S’s mom’s house and then to our new, beautiful kitchen by October.

We figured we’d try some new places in town while we are displaced and I’m excited to have found what may be a new favorite! Park Cafe is located off-the-beaten path of normal Charleston restaurants in a very historic and family-friendly neighborhood. I’ve driven by it a dozen times but never stopped in until a (vegetarian) friend suggested it for girls night. She had first heard about it from a vegan mutual friend, so we figured it was definitely worth a try!

IMAG0227

I started with the Roasted Cauliflower– a huge serving topped with hazelnuts, a mustard vinaigrette  and fresh herbs. It was incredibly filling but also a fantastic combination of texture, flavor, and aromas. I would eat this by itself as a meal and plan to return very soon to do so!

IMAG0228

My dining partner started with the shredded kale salad– a light combination of dates, almonds, and a citrus vinaigrette. We both kept “mmmmm” ing, dipping our fork to capture more bites of this amazing salad, and I’m quite sure if we hadn’t been in public, she would have licked the bowl clean!

IMAG0229

We both ordered the mushroom and walnut pate with pickled onions, arugula, and dijon on sourdough as our main entree. The sandwich comes with Park Cafe’s homemade pickles, which on this day were made from cauliflower, onions, okra, and green beans. They were perfectly spiced and pickled and provided the perfect balance to the richness of the pate. The pate itself was smoother than anything I’ve ever tasted (that didn’t come processed from a jar!) and the combination of the crunch of the bread with the soft pate made for a perfect sandwich. I took my leftovers home with me but found myself snacking on the rest of the sandwich immediately upon walking in the door!


My friend and I are both of the opinion that dining out can be overshadowed and thus, less enjoyable, by the fact that you can make an item at home better. We often compare meals we had out at a restaurant and finish our story with “but I could have done it healthier at home” or “I can make that at home and would add _____”. It makes dining out difficult, but it also means we appreciate those really good meals even more so. Park Cafe hit the nail on the head for both of us- neither of us schemed about how we could recreate these dishes at home, because we were too busy enjoying them in the moment!

Overall we were really impressed not only with the quality and creativity of the food, intimate yet casual ambiance, and service at Park Cafe, but also by the fact that unlike most restaurants, we didn’t have to ‘customize’ anything to suit a vegetarian lifestyle. We ordered all 3 items exactly as they’re listed on the menu and that’s an amazing feeling for someone who usually has to double check  that “there’s no meat in this, right?”.

Park Cafe checked all the ‘must-have’ boxes on my requirements for a favorite restaurant and we look forward to returning–even when we do have a beautiful new kitchen in our new house!

Blueberry Pizza!?

Despite intuition that blueberries grow in cool climates (think Maine!) we’re right in the midst of blueberry season here in the Lowcountry. Last week I took a day off work and played hooky, heading out to our favorite family owned, organic farm in the area. D and I spent about an hour in the field and came out with about 10 POUNDS of fresh blueberries– many are safely stored in the freezer to be enjoyed throughout the year, but we’ve enjoyed our fair share (if not more!) this year with yogurt, in smoothies, and just popped in our mouths straight out of the bowl. Needless to say, we’ve got blueberries on the brain!

While we haven’t yet tackled canning and pickling of our own fresh veggies to keep them year round, my aunt in New York has perfected jams and compotes, and we are lucky to get to share in her bounty and creativity! She recently gave us a blueberry compote with flavors reminiscent of BBQ sauce (regrettably I don’t know the recipe) and when we found ourselves with an opened log of goat cheese, we knew the tart and sweet combination of the blueberries with the vinegar in the compote, and the smooth creamy taste of the goat cheese would be great on a pizza!

Blueberry compote, goat cheese, tempeh and kale pizza

Blueberry compote, goat cheese, tempeh and kale pizza

Blueberry Compote and Goat Cheese Pizza

1 package whole wheat pizza dough (or be 100% authentic and make your own!)

enough compote to cover the pizza dough–about 4 tablespoons

4 oz goat cheese

1 oz tempeh per person

3-4 large leaves kale, destemmed, washed, and thinly sliced

garlic powder


Pull pizza dough out of fridge to come to room temperature about 30 minutes before starting to assemble. About 10 minutes before ready, turn the oven to 400 degrees and put a cookie sheet or pizza stone in the oven to preheat.

Grate tempeh into a skillet with olive oil and season with salt, pepper, and garlic powder. Cook about 5 minutes until golden brown and crunchy. Set aside to cool.

On a pizza peel or large cutting board, lightly sprinkle cornmeal (or flour, if you don’t have cornmeal) to coat the surface. Stretch out the dough to your desired size and lay on the board, ensuring that the bottom of the dough gets sufficiently coated–you’ll need this to get the dough OFF the board and onto the cookie sheet/pizza stone. (Note: the dog will likely come visit during the stretching step– they have no faith that you won’t drop the whole thing on the ground!)

Spread the compote on the dough like you would with tomato sauce, topping with dollops of goat cheese. Sprinkle the tempeh over the goat cheese. Once the oven is fully heated and the cookie sheet/pizza stone have gotten at least 10 minutes to come up to temperature, remove the sheet/stone from the oven and spray or brush with oil. Quickly transfer the formed pizza to the HOT sheet/stone and as needed, adjust the shape and toppings.

Cook at 400 degrees for about 10 minutes. When the crust begins turning golden and the cheese begins melting, top the pizza with the chopped kale and cook for another 3-4 minutes until it begins to crisp up. Remove the pizza from the oven and if you can, wait for it to cool before slicing.

everything you could want in a pizza and MORE!

everything you could want in a pizza and MORE!

HOLY PIZZA! Whether it’s considered a pizza or a flatbread I don’t know, and honestly don’t care. The sweet, the tangy, the crunch, the slight char of the kale, and the soft, chewy dough– this was a great culinary risk considering we had no idea how the compote would fare in the oven. My sole regret is that I can’t share the full recipe, since I don’t have the compote recipe and only have a few more ounces left for ourselves!

We loved this combination and look forward to integrating our fresh blueberries with goat cheese as well. Thanks Aunt Jane for the inspiration and creative use of your own local produce!

Vegetarian by Choice, Accidentally Vegan??

Going vegetarian was a very conscious and very intentional decision. We wanted to cut out meat from our diet, for not only ethical reasons but also health purposes, and after reading Jonathan Safran Foer’s Eating Animals it just seemed difficult to wrap our heads, and mouths, around eating meat. But now, 2 years later, it seems our diets have changed in ways we didn’t expect. Often we find that the delicious meal we’re eating is actually vegan– quite accidentally! About 18 months ago we switched from dairy milk to almond milk– honestly because neither D nor I drink milk fast enough to justify buying even a 1/2 gallon at a time. We found we’d throw out milk almost every time we bought a bottle, and after tasting almond milk (we like Blue Diamond’s unsweetened original best) we figured…why not?! We now use almond milk for cereal, smoothies, coffee, oatmeal, baking, and everywhere else you’d add milk. I also switched over to using flax eggs in most of my baking, just because I find it an easy replacement (we dedicated our old coffee grinder to the task of grinding our seeds each time we need them) and flax seeds are much easier to store than dozens of eggs! As a result, we really only eat eggs when we’re making something…eggy… fried eggs over hash browns, quiche, fried rice, etc! These replacements were conscious, but in all honesty, by no means were they a concerted effort to be vegan…they were just replacements that made sense in our lives. As I’ve mentioned, I don’t think I could ever go 100% vegan simply because I’d miss really good quality, small batch cheeses!

But it seems, week after week, that we end up cooking vegan! Last night’s meal was the perfect example of summer eating in our house– taking the backyard ‘crops’ and turning them into a delicious meal. Our garden is flourishing and in the past 5 days, we’ve harvested 2 eggplants, a spaghetti squash, a yellow squash, 5 bell peppers, 6 jalapenos, 2 beefsteak tomatoes, dozens of heirloom and cherry tomatoes, and handfuls of herbs. We did a bunch of work in the yard after work yesterday (a 2 day project–removing a huge shrub and the remaining root ball from the yard!) and it was just too hot to eat a heavy meal. Last night’s dinner was 99% home-grown (everything except the condiments and salt/pepper came from our yard) and accidentally vegan-  a win-win! Keep reading to see what other ‘accidentally vegan’ meals we’ve been cooking up!

With 'crops' in our own yard, it's easy to skip the grocery store produce section in the summer!

With ‘crops’ in our own yard, it’s easy to skip the grocery store produce section in the summer!

Spaghetti Squash with Balsamic Tomatoes 

1 cup spaghetti squash, cooked and flesh removed from skin

handful of tomatoes, any variety

fresh basil, torn or chopped

salt and pepper to taste

1 clove garlic

balsamic vinegar

olive oil

Put the tomatoes and fresh basil in a small bowl and drizzle with balsamic vinegar, salt and pepper– let them sit and marinate. Coat a saute pan with olive oil and cook the garlic on medium-high heat just until it starts to release aroma. Add in the cooked spaghetti squash and coat with the garlic oil, then gently stir in the tomato mixture. Cook all ingredients together about 3-4 minutes, until the tomatoes soften. You could top it with fresh mozzarella cheese, but it’s fantastic as is, and very light!

Note: Our spaghetti squash was huge, so we cooked it up this weekend, pulled out the flesh, and will store it in the fridge for the week, pulling it out as needed. As a result, this meal took only as long to prepare as the saute pan took to heat up- if you’re cooking the spaghetti squash in the same night, it’ll be about an hour for cook time plus the time to assemble the dish.

Replace spaghetti squash for pasta in most recipes for a low-carb version!

Replace spaghetti squash for pasta in most recipes for a low-carb version!

 Morning Breakfast Smoothie

1 banana

1/4 cup almond milk

1 tsp flax seeds (whole is fine, the blender will chop them up)

heaping spoonful of almond or peanut butter

6-8 ice cubes

Mix all ingredients in a blender for a thick, creamy, and very filling morning smoothie!


Adapted from Bon Appetite's June 2014 version

Adapted from Bon Appetite’s June 2014 version

Barley and Fennel Salad

We modified Bon Appetite’s recipe from the June edition, removing the beets and red onion completely. Our vinaigrette was made with mostly freshly squeezed grapefruit juice instead of the vinegar, then just a dash of apple cider vinegar made up the remainder of the liquid in the dressing. This was tasty, filling, and had great texture between the crunch of the fennel and almonds compared to the soft barley. The mint came from our yard and we added some of the fennel fronds into the salad for some extra green and fennel flavor!


Our philosophy about a vegetarian/vegan lifestyle  is that reducing your animal product intake, even once a day or once a week, is better than nothing. Can you make that commitment? Can you acknowledge that not every meal needs a serving of meat, egg, cheese, or dairy? Try some of these recipes, or many of the other ones on the blog, to kick start a new kind of dining experience. Or better yet, take your favorite recipe and make it vegetarian/vegan- it’s a fun challenge and incredibly rewarding. And when it happens accidentally, it’s even more amazing! At the end of the day, adhering to a vegetarian lifestyle isn’t a sacrifice, it’s an opportunity to flip what you think about food 180 degrees. And when your ingredients happen to be as local as your backyard, or even a local family farm, you’ve got no reason not to.

Guest Blogger: D’s Grilled Asian Tofu

Hello blog world! This is D (AKA Big Daddy Veg) with a guest blog post! As a teacher I have summers off, and this inevitably leads to a daily “honey-do” list every morning from S. It also usually leads to me having a lot of free time on my hands, and so I get to spend a lot more time flexing my culinary muscles in the kitchen!

For last night’s dinner, I was inspired by a block of tofu that was already pressing in the fridge just begging for a marinade. We always have a section in the fridge full of Asian condiments, but I wanted to do something a little different. S has been making smoothies in the morning and so we had a container of pineapple in the fridge… light bulb! This marinade is full of the natural sweetness of the pineapple and it makes for an excellent char on the grill. The best news is since the tofu isn’t raw meat, the marinade can do triple duty by dressing the soba noodles after they are cooked and the rest can go on top of the tofu as a sauce after it comes off the grill!

Sweet, tangy, charred, and salty-- a great combo!

Sweet, tangy, charred, and salty– a great combo!

Grilled Marinated Tofu

1 block extra firm tofu, pressed for a day to remove water, then cut lengthwise into three “steaks”

Soy sauce

Hoisin

Sambal, or other Asian chili sauce

Pineapple, canned or fresh (we used canned)

Garlic

Ginger

Demarara or brown sugar

Combine all ingredients except tofu into a small blender or mini-chopper and puree until a smooth marinade forms. Put tofu in a zip-top bag just big enough to hold it, then add in all the marinade. Put the bag in a container to prevent leakage and place the container in the fridge. Flip the tofu every few hours to marinate evenly anywhere from one to two days (I did two). When you are ready to cook, get a grill as hot as possible and grill the tofu on both sides until a nice char and crust forms (it helps to leave the cover down to heat the whole piece through). When done cooking, remove the tofu from the grill and serve topped with extra marinade and over noodles and baby bok choy (recipe to follow).

For the soba noodles, cook in boiling water according to the directions on the package. Drain, then return to the pot and add in enough marinade to coat while tossing.


Steamed Baby Bok Choy

3 baby bok choy

Garlic, minced

Ginger, grated or thinly sliced

White miso paste (to taste)

Slice each of the baby bok choy in half lengthwise. In a deep skillet with a tight-fitting lid, add water, ginger, garlic, and miso paste and whisk to combine. The mixture in the skillet should still be watery, and come up to about halfway up the pan wall. Place the bok choy in the skillet, put on the lid and raise the heat to medium. Cook for 5-10 minutes, until bok choy is tender.

S and I put the noodles in the base of a bowl, topped them with a few pieces of bok choy and then put a tofu steak on top. The flavors in this are explosive! The sweet and spicy sauce, the perfumed bok choy, the base of the noodles… we scarfed this one down! The best part is you can customize the marinade to suit your own tastes: less spicy, less sweet, more ginger… happy eating!